Friday, October 25, 2013

Slow-cooker Roasted Sweet Pepper Chicken Stew

Me and my slow cooker are best buds, which explains why 50% of my recipes have the word "stew" in the title! It's just so nice to throw a bunch of ingredients in, go about your day, and come back to a delicious meal! Between my slow cooker and my food processor, I would probably give up everything else in my kitchen to keep those two items. Life savers!

This recipe was inspired by a large jar of roasted sweet peppers that I picked up at Costco the other day. I love roasted peppers, and I am always happy to use a more milder pepper when I slow cook so the heat isn't too crazy. I've made at least two slow cooker meals in the last month that have been so spicy that we barely were able to salvage them. One of them we complete lost because one bite and my mouth was so on fire that I couldn't even taste anymore. Whoops! I blame that one on my love of curry and my dislike of actual measuring spoons.

So when I picked up this lovely large jar of roasted peppers, I knew I could make a delicious puree and use it as a sauce for some slow-cooker shredded chicken. Serve this over some cauliflower rice, regular rice (if you eat it), or even over some other vegetable of your choosing! I served mine over some leftover brussel sprout slaw and it was delicious and nutritious!

Does anyone else love the Biggest Loser? It's premiered last week and I am super excited! Not sure why, but that show is just one of my favorites and I cry so often watching it! Now I can cry, and then comfort myself with some sweet pepper chicken!

Ingredients
1) 2 pounds of boneless, skinless chicken (I used thighs, you can use breasts too)
2) 2 cans (about 30 oz) of diced tomatoes
3) 2 onions, diced
4) 2 cups of roasted peppers (make sure they are sweet peppers, which they should be)
5) Optional: 1/2 cup of diced green chilis for a little heat

Instructions
1) Pull out your slow cooker and add in your chicken. No need to cut up: it'll get shredded at the end.
2) Using your food processor or a blender, add in your 2 cups of peppers and puree until smooth.

3) Add in your onions, diced tomatoes (and diced green chilis if using) to the slow cooker.
4) Add in your pureed sweet peppers.
5) Mix everything together, and cook on low for 8-10 hours. (I cooked for 10 hours before I don't like my onions to have any crunch left at all).
6) After the cooking is done, use two forks to carefully shred the chicken. Mix everything together, and serve this alone, over rice, or over another vegetable. Eat up!


Sunday, October 20, 2013

Shredded Balsamic Bacon Brussel Sprouts

I don't know that I ever had brussel sprouts growing up, to be honest. But once I got more into cooking and into Paleo, I had dabbled in some vegetable exploration. There are so many different kinds of delicious vegetables out there with insane health benefits! Brussel sprouts have a very similar taste to broccoli, in my opinion, and are absolutely amazing when roasted. But I wanted to try something new with them this time. This recipe was inspired by a cookbook I was browsing and saw the use of broccoli and brussel sprout "slaw" to add some bulk to recipes. Also, I had just gotten some very tasty cherry balsamic vinegar at the farmer's market and this provided a perfect place to test it out!

And the bacon? Why not! I used some uncured, sugar-free delicious bacon from US Wellness Meats, who are the best online meat source that I have found!

Add this delicious side dish to some salmon or steak and have a delicious dinner the whole family will enjoy, and the kids won't even realize it's brussel sprouts!

Ingredients
1. 2 pounds (one package) of brussel sprouts
2. 8 oz/slices of bacon, diced
3. 1/4 cup of balsamic vinegar or flavored balsamic vinegar
4. 1/4 cup of olive oil or coconut oil

Instructions
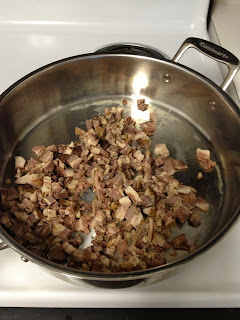
1. Heat up a large skillet over medium-low heat, add your diced bacon, and cook until the bacon bits have shed a lot of their oil and are crispy.
2. While the bacon is cooking, use a food processor with the shredder attachment and shred your brussel sprouts.
3. Strain the bacon from your pan and leave in the bacon grease.
4. Add the shredded brussel sprouts to your pan and raise the heat to medium. Cook for 10-15 minutes until your sprouts are tender and browned.
5. In a bowl, mix your vinegar and oil and add it to the brussel sprouts. Add back in your bacon at this time as well. Cook an additional 2-5 minutes until everything is warmed.
6. Serve these up! Enjoy!


Tuesday, October 15, 2013

Sausage & Kale Acorn Squash Stew

This recipe is dedicated to my good friend Shannon, who somehow hates sweet potatoes. It's ok, I still love her even if she is missing out on nature's delicious tuber! She has blessed off on this recipe, so you know it must be good! 

So this recipe is sort of a remake of my chicken and kale stew, but in order to eliminate the sweet potatoes, I added in cut up acorn squash instead for the starch, and subbed chicken for delicious ground sausage! And success! I have made a few things that turned out "OK" and I don't put on my blog, and I was a little nervous about this one. But it turned out awesome and me and the boyfriend actually really enjoyed it! 

Ingredients
1) 2 pounds of ground sausage (or ground pork) -- you can sub another meat if you want but the ground sausage has spices in it which helped with the overall flavor. Your call!
2) 2 acorn squash - peeled and diced
3) 3 green peppers, diced
4) 3 onions, diced
5) 1 package (3-4 cups) of baby kale (or regular kale, and then just run a knife through it)
Extra: 2 cups of chicken stock or water to make this more soup-like. I added the chicken stock and I am glad I did!

Instructions
Get our your slow cooker!

1) Heat up a large skillet over medium heat and add in your sausage.  
                                                  
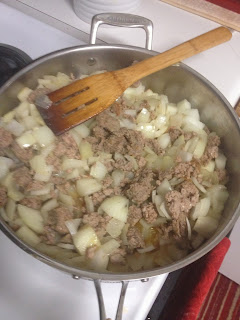
2) Once the sausage has released some oil and is at least half way cooked, add in your diced onions. Cook for 10-15 minutes until the onions are translucent.
3) In the mean time, chop up your green peppers and acorn squash. Add them to the slow cooker, along with the chicken stock/water if using it.
4) Once the sausage and onions are cooked partially, add them to the slow cooker as well, and mix to incorporate everything.
5) Cook on low for 8 hours.
6) 30 minutes before serving, stir in your kale and cook an additional 30 minutes of low to wilt the greens.
7) Serve it up and enjoy!


Friday, October 11, 2013

Pistachio-Almond Ice Cream (No Added Sugar)

We love ice cream. It has not been uncommon to see my boyfriend eat an entire 1/2 gallon of Blue Bell ice cream on a weekend, while I enjoy a bowl or two myself. This was part of our 20% non-Paleo, and it was definitely catching up to us!

So I wanted to try and replicate one of the flavors of Blue Bell that I really enjoy: Pistachio Almond. This recipe is my attempt at it, and while it really is only about 50% close to the same flavor, it is still very tasty! Apparently I need some artificial flavors and a butt-load of sugar to accurately portray the flavors of pistachios and almonds. Isn't that sad?

Ingredients
1) 1 call of full fat coconut milk
2) 1 egg yolk
3) 1 very ripe banana
4) 3/4 cup of shelled pistachios
5) 1/2 cup of almonds
(Extra: You could add in some honey or maple syrup if you want it sweeter. It's only as sweet at that banana)

Instructions
1) Add your pistachios to a food processor and blend until powdery.
2) Add in your banana, egg yolk and coconut milk, and blend until smooth.
3) Chop up your almonds, or use slivered almonds if you have them. Fold them into your mixture.
4) Add the mixture to your ice cream maker, if you have one, and follow the instructions provided for your unit. OR---pour mixture into a shallow glass pan and place in the freezer. Check on it every 15 minutes and stir, until it's solid to your liking. Be warned, if you leave it in too long the coconut milk gets a little icy. Just leave it at room temperature for 10-15 minutes to warm back up upon serving.


Friday, October 4, 2013

Apple Pie Bars (Sugar-free, No added honey/maple syrup)

I like desserts.

That pretty much could sum up this blog post.

I have a previous dessert recipe for apples with coconut cream, which is delicious and always a favorite here for dessert. This treat here uses that as a filling, but then adds a date/nut/coconut base to make them into what I like to call Apple Pie bars. This batch literally lasted 12 hours in my house---don't say I didn't warn you!

Coconut cream concentrate is also called coconut cream, coconut butter, or coconut manna. I bought mine from Tropical Traditions, but there are plenty of other brands out there as well. Or you can throw unsweetened shredded coconut in the food processor and blend it for like 3-5 minutes like you would a nut butter, and you can get a similar product. It's just coconut, anyway!

Hope you enjoy it as much as we do.

Ingredients
1) 1/2 cup of pitted dates
2) 1/2 cup of nuts (I used almonds, but next time I'm going to try a cashew/almond mixture, or even macadamia nuts if you want!)
3) 1/4 cup + 1/4-1/2 cup of Coconut Cream
4) 3 medium-sized apples
5) 1-2 Tablespoons of cinammon (or apple pie spice, or pumpkin pie spice)

Instructions
1) Place your dates and nuts in a food processor and blend for at least 2 minutes until the nuts really break down.
2) Add in 1/4 cup of your coconut cream, and blend again. Your mixture will look grainy like sand.
3) In an 8x8 baking pan, add your food processor mixture. Press down to form an even layer at the bottom of your pan. Don't worry, once this hardens in the fridge for a few hours it'll solidify together.
4) Dice up your apples. I cut them into thin slices, which seem to work best.
5) Heat up a large skillet over medium heat, and add your apples. Cook for 20-30 minutes, stirring occasionally, until the apples are super soft and cooked.
6) Add in your cinammon/spices and stir. Then add in 1/4 cup of coconut cream and mix. At this point you can add in an additional 1/4 cup of coconut cream to make it extra thick (I did), but if it looks good to you, stick with less. It's personal preference!
7) Pour the apples on top of the crust and press down to form an even layer.
8) Place in the fridge for at least 3 hours to allow the crust to harden so you can cut it. Trust me, if you try to eat it 1 hour later (like I did), then your crust will fall apart. Give it time!


Tuesday, October 1, 2013

Citrus Steamed Salmon

We make it a habit to eat salmon once a week for all the great omega-3's. Plus, it's delicious! While I normally cook it crispy-skin style on the stove top, this way is equally tasty, and it is definitely easier!

Use any kind of citrus you have on hand to flavor this dish. I used orange this time, but it is also delicious with lemon and lime. If you like grapefruit, try it out!

Ingredients
1) 2-4 salmon portions (about 6oz each is pretty standard)
2) 2-4 teaspoon of your favorite cooking oil (Olive oil, ghee, coconut oil, avocado oil, etc!)
3) 1 citrus fruit of your choice
4) Salt and Pepper to season

Instructions
1) Preheat oven to 400 degrees.
2) Take out a piece of aluminum foil and make sure it's long enough to we wrapped around your salmon pieces (about the size of a 13x9 cookie sheet)
3) Place your salmon portions skin side down on the aluminum foil.
                                                     
4) Add 1 teaspoon of oil to each portion and rub on the entire surface. Sprinkle with salt and pepper, or any spices you prefer.
5) Slice up your citrus fruit into small discs.
6) Place your fruit on top of your salmon.
7) Roll your aluminum foil across your salmon, creating a pocket. Make sure you seal all sides so the salmon steams in the aluminum foil.
8) Cook at 400 degrees for 18-22 minutes, until salmon is your desired doneness. (I did mine for 20 minutes).